You do not have to contact a professional to enhance your garage floor. Following the proper steps, you can complete Garage Floor Epoxy as a DIY task that makes your floor sturdier and more attractive. This guide takes you through all the steps that you need to follow. People still have the chance to produce professional results by carefully arranging their plans and selecting the correct tools.
Why Choose Epoxy for Your Garage?
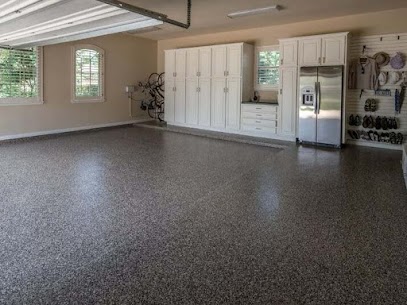
Epoxy creates a rigid, chemical-resistant surface. It prevents your garage’s floor from getting oily, wet, or scratched. Above all, it makes the floor shiny and straightforward
to clean. Many homeowners choose epoxy because it requires little care and lasts for years without needing to be touched up. The paint’s high sheen helps to shine the light inside the garage and lighten it up.
Preparation Is the Key to Success
Epoxy’s bond with concrete depends on how it is prepared. First, empty the whole garage to start afresh with a clear space. After that, sweep and vacuum to remove all the dust and waste. You may have to mend any gaps or holes in the roof. Any cracks or damage on the surface may reduce the effectiveness of the epoxy, so you shouldn’t forget to fill them out. It is necessary to carry out moisture testing.
Essential Tools You’ll Need
Prepare all the needed tools in advance to avoid any difficulties while applying. If you are well-prepared, the outcome of your work is much better. The lack of proper tools can prevent the best epoxy kits from achieving results.
This is what you should have for using the Garage Floor Epoxy product:
- Either use a floor grinder or an acid etch solution on the surface.
- Use a mop, vacuum, and broom to clean the area.
- You should also remember to use protective gear at all times.
- You will need paint rollers and extension poles as well.
- A small brush is suitable for painting near edges and corners.
- Apply your drill bit, then use the new colour in the bucket.
Materials for a Strong Finish
You must use strong and compatible materials and tools to build a durable finish. Using the correct materials will cause your epoxy floor to bond strongly and last longer.
Be sure to have everything you require before you start working.
- Epoxy resin and hardener in combination (kit).
- A material that removes Stains or grease.
- Primer should be applied to help seal the plaster and cover its pores (for better adhesion).
- UV and scratch-resistant topcoat.
- Decorative chips and non-slip grit to your mix can add a good feel (optional).
Select the goods recommended by the manufacturers for optimal results and compatibility.
Tips to Make the Process Easier
Adopting some helpful tips allows beginners to create amazing projects with epoxy. Before blending everything, always refer to the instructions. Blend only the amount that you will be able to use within the given working time. Put the epoxy down slowly, starting at the farthest part of the vehicle and working your way to the exit.
conclusion
Doing a Garage Floor Epoxy project alone will make you happy and accomplished. Equipped with the necessary gear, materials, and information, turning a plain concrete floor into something attractive and long-lasting is possible. Be sure to carefully plan your actions and follow each step to protect your garage floor.
